
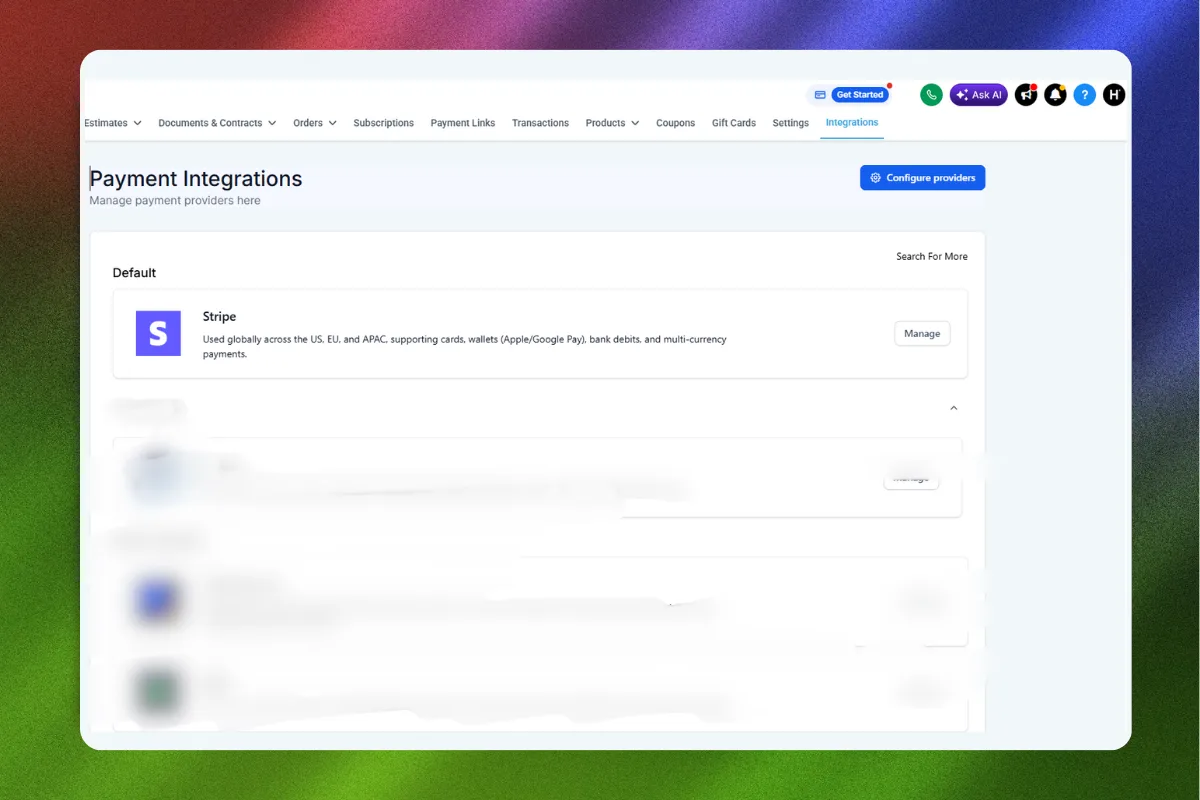
If you're running a coaching, consulting, or agency business on GoHighLevel and you haven't connected Stripe yet, you're leaving money on the table every single day. Stripe is the payment backbone of GoHighLevel. Without it, you can't sell products through your funnels, process subscriptions, manage invoices, or collect payments from order forms. It's not optional. It's foundational.
The good news: connecting Stripe to GoHighLevel takes less than ten minutes if you know exactly what to do. The bad news: most tutorials skip the details that matter. They walk you through the basic connection and ignore the configuration that actually makes your payment system reliable, profitable, and scalable.
This guide covers everything. From creating your Stripe account to connecting it at both the agency and sub-account level, setting up products, configuring payment plans, testing transactions, handling common errors, and optimizing for conversions. Whether you're setting up payments for the first time or migrating from another platform, this is the only guide you'll need.
Why Stripe Is the Default Payment Gateway for GoHighLevel
GoHighLevel supports a handful of payment processors, but Stripe sits at the center of the ecosystem. Here's why it matters:
Stripe processes payments in over 135 currencies across 47 countries. It handles one-time charges, recurring subscriptions, payment plans, trials, and custom billing cycles. Inside GoHighLevel, Stripe powers everything from funnel checkout pages to invoice payments to membership access gates.
Other gateways like PayPal, Square, and Authorize.net have limited integration points. Stripe connects to all of them: funnels, websites, order forms, invoices, proposals, the payments tab, and even the affiliate manager. If you want full functionality, Stripe is the only option that doesn't leave gaps.
The processing fees are straightforward: 2.9% plus $0.30 per transaction for standard accounts. No monthly fees. No hidden costs. And GoHighLevel doesn't add any markup on top of Stripe's rates.
“Stripe isn't just a payment processor inside GoHighLevel. It's the infrastructure that turns your funnels from lead capture tools into revenue machines.”
Before You Start: What You Need
Let's get the prerequisites out of the way so you're not scrambling mid-setup.
Stripe Account Requirements
You need a verified Stripe account. If you don't have one yet, go to stripe.com and create one. During setup, Stripe will ask for:
- Your business name and type (sole proprietor, LLC, corporation)
- Your EIN or SSN (for US-based businesses)
- A bank account for payouts
- Your business website URL
Verification typically takes 24 to 48 hours. You can start connecting to GoHighLevel immediately, but live transactions won't process until Stripe verifies your identity and banking details.
GoHighLevel Account Requirements
You need an active GoHighLevel account. The Stripe integration is available on all plans, including the Starter plan at $97 per month. If you're running an agency, you'll want the Agency Unlimited plan ($297/month) since you'll be connecting Stripe across multiple sub-accounts.
Make sure you have admin access to both the agency dashboard and the sub-account where you want to process payments.
Step 1: Connect Stripe at the Agency Level
This step is critical if you're running GoHighLevel as an agency with client sub-accounts. Connecting Stripe at the agency level enables SaaS mode billing, marketplace payments, and agency-level reporting.
- Log in to your GoHighLevel agency dashboard
- Click on Settings in the left sidebar
- Navigate to Integrations
- Find the Stripe card and click Connect
- You'll be redirected to Stripe's OAuth authorization page
- Select the Stripe account you want to connect (or create a new one)
- Authorize the connection
- You'll be redirected back to GoHighLevel with a green "Connected" status
That's the agency level sorted. But this connection alone won't let your sub-accounts process payments. Each sub-account needs its own Stripe connection.
Step 2: Connect Stripe to Your Sub-Account
This is where the actual payment processing happens. Every sub-account that needs to accept payments must have its own Stripe connection.
- Switch to the sub-account where you want to process payments
- Go to Settings from the left sidebar
- Click on Integrations (under Business Profile)
- Locate the Stripe integration
- Click Connect
- Authorize the Stripe account through OAuth
- Confirm the connection shows as active
Agency vs. Sub-Account: Which Stripe Account to Use?
This trips people up. Here's the straightforward answer:
- Same Stripe account for agency and sub-accounts: Use this if you're selling your own products and services. Revenue goes to one place.
- Different Stripe accounts per sub-account: Use this if you're an agency managing clients. Each client connects their own Stripe account so payments go directly to them.
- Your Stripe account on client sub-accounts: Use this if you want to collect payments on behalf of clients and then pay them separately. Common in white-label setups.
The setup is the same regardless. The only difference is which Stripe account gets authorized during the OAuth flow.
“Every sub-account needs its own Stripe connection. The agency-level connection handles billing and SaaS mode. The sub-account connection handles customer-facing transactions.”
Step 3: Create Products in Stripe
Before you can sell anything through your GoHighLevel funnels, you need products configured in Stripe. GoHighLevel pulls product data from Stripe for recurring payments and payment plans.
One-Time Products
For simple one-time purchases, you can create the product directly inside GoHighLevel's funnel builder. No Stripe product setup needed. Just add a price to your order form element in the funnel editor.
Recurring Products (Subscriptions and Payment Plans)
Recurring products must be created in Stripe first:
- Log in to your Stripe dashboard
- Go to Products in the top navigation
- Click + Add Product
- Fill in the product details:
- Name: Match what you'll display in GoHighLevel
- Description: Optional but helpful for tracking
- Pricing: Set the recurring price
- Billing period: Weekly, monthly, quarterly, yearly, or custom
- Click Save Product
- Copy the Price ID (starts with
price_)
You'll use this Price ID when configuring your GoHighLevel funnel's order form to connect the two systems.
Setting Up Payment Plans
Payment plans are slightly different from subscriptions. A subscription runs indefinitely until canceled. A payment plan has a fixed number of payments.
In Stripe:
- Create a new product
- Set the recurring price (e.g., $297/month)
- Set the billing period (e.g., monthly)
In GoHighLevel:
- Open your funnel editor
- Add or edit an Order Form element
- Select Stripe as the payment provider
- Choose your recurring product
- Set the number of payments (e.g., 6 payments of $297)
GoHighLevel handles the payment count logic. Stripe processes each recurring charge. When the payment count is reached, GoHighLevel automatically cancels the subscription in Stripe.
“One-time products live in GoHighLevel. Recurring products live in Stripe. Payment plans bridge both: created in Stripe, managed by GoHighLevel.”
Step 4: Configure Payment Forms in Your Funnels
Now for the part that actually makes you money. Setting up payment collection inside your funnels.
Adding an Order Form to a Funnel Page
- Open your funnel in the GoHighLevel funnel builder
- Navigate to the page where you want to collect payment (typically the checkout or order page)
- From the elements panel, drag an Order Form element onto the page
- Click on the Order Form to open its settings
Order Form Configuration
In the Order Form settings, you'll configure:
Products Tab:
- Click Add Product
- For one-time products: enter the name and price directly
- For recurring products: select from your connected Stripe products
- You can add multiple products (main product plus order bumps)
Payment Methods:
- Credit/Debit Card (powered by Stripe)
- You can also enable PayPal if you've connected it
Bump Offers:
- Toggle on Order Bump
- Add a bump product with a compelling description
- The bump appears as a checkbox on the order form
Coupons:
- Enable coupon codes if you want to offer discounts
- Create coupons in GoHighLevel under Payments > Coupons
Two-Step Order Forms
Two-step order forms capture contact information before showing the payment fields. This is powerful because even if someone doesn't complete the purchase, you've captured their email for follow-up sequences.
To set this up:
- Add an Order Form with the Two-Step layout
- Step 1 collects: Name, Email, Phone
- Step 2 shows: Payment details and order summary
- When Step 1 is submitted, a contact is created in GoHighLevel
- You can trigger an automation for abandoned carts
This approach typically increases overall conversions by 15 to 30 percent because you're capturing leads even from people who don't buy immediately.
Step 5: Set Up Payment-Triggered Automations
This is where GoHighLevel really shines over standalone Stripe. You can trigger entire workflows based on payment events.
Key Payment Triggers
In the GoHighLevel workflow builder, you'll find these Stripe-related triggers:
- Payment Received: Fires when any payment is successfully processed
- Order Form Submission: Fires when an order form is submitted (even if payment fails)
- Subscription Created: Fires when a new recurring subscription starts
- Subscription Cancelled: Fires when a subscription is canceled
- Invoice Paid: Fires when an invoice is paid through the payments system
Common Payment Automations
Post-Purchase Welcome Sequence:
Trigger: Payment Received
Actions: Send welcome email, add tag "Customer," enroll in onboarding workflow, add to pipeline
Failed Payment Recovery:
Trigger: Payment Failed
Actions: Wait 1 hour, send SMS "Your payment didn't go through," wait 24 hours, send email with update payment link
Subscription Cancellation Save:
Trigger: Subscription Cancelled
Actions: Send retention email, add tag "Churned," notify team via internal notification, add to win-back pipeline
Upsell Sequence:
Trigger: Payment Received (specific product)
Actions: Wait 30 minutes, send upsell email with next-tier offer
These automations run automatically once configured. No manual follow-up needed. That's the whole point: Stripe handles the money, GoHighLevel handles the relationship.
“Payment automations are the difference between a business that collects money and a business that maximizes revenue. Build them once, they work forever.”
Step 6: Test Your Payment Setup
Never go live without testing. Here's the complete testing process:
Enable Stripe Test Mode
- In your Stripe dashboard, toggle the Test mode switch in the top right
- In GoHighLevel, your connected Stripe account will automatically use test mode when Stripe is in test mode
Test Card Numbers
Stripe provides test card numbers that simulate different scenarios:
- Successful payment: 4242 4242 4242 4242
- Card declined: 4000 0000 0000 0002
- Requires authentication: 4000 0025 0000 3155
- Insufficient funds: 4000 0000 0000 9995
Use any future expiration date and any 3-digit CVC.
Testing Checklist
Run through each of these before going live:
- Submit a successful test payment through your funnel
- Verify the contact was created in GoHighLevel
- Check that payment-triggered automations fired
- Confirm the payment appears in GoHighLevel's Payments section
- Test a failed payment and verify your recovery automation triggers
- If using subscriptions, verify the recurring charge schedule in Stripe
- Test the order bump to ensure both products are charged correctly
- Try a coupon code if you've set them up
- Check that the thank-you page redirects properly after payment
Switch to Live Mode
Once testing passes:
- Toggle Stripe back to Live mode
- Verify your GoHighLevel connection still shows as active
- Process a small real transaction ($1 test product) to confirm end-to-end
- Delete the test transaction and refund the $1 charge
Common Stripe Integration Issues and Fixes
Even with a clean setup, things go wrong. Here are the most frequent issues and their solutions.
"Stripe Not Connected" Error
Cause: OAuth token expired or was revoked.
Fix: Go to Settings > Integrations, disconnect Stripe, and reconnect. This generates a fresh OAuth token.
Payments Appearing in Stripe but Not GoHighLevel
Cause: The payment was processed outside of GoHighLevel (directly through Stripe's dashboard or another integration).
Fix: Only payments initiated through GoHighLevel's funnels, invoices, or order forms will appear in GoHighLevel's Payments section. This is by design.
Recurring Payments Not Processing
Cause: The Stripe product's Price ID doesn't match what GoHighLevel expects, or the customer's card expired.
Fix: Verify the Price ID in your order form matches the one in Stripe. For expired cards, GoHighLevel will fire a "Payment Failed" trigger so you can notify the customer.
Currency Mismatch
Cause: Your Stripe account is set to a different default currency than your GoHighLevel sub-account.
Fix: Ensure both use the same currency. You can update this in Stripe under Settings > Account Details.
Webhook Errors
Cause: GoHighLevel's webhook endpoint isn't receiving Stripe events.
Fix: In Stripe's dashboard, go to Developers > Webhooks. Verify the GoHighLevel endpoint is listed and showing successful deliveries. If it shows failures, disconnect and reconnect Stripe in GoHighLevel to regenerate the webhook.
“Most Stripe issues in GoHighLevel come down to one thing: a stale connection. When in doubt, disconnect and reconnect.”
Advanced Configuration: Stripe for Agencies
If you're running an agency on GoHighLevel, Stripe becomes even more powerful with these advanced setups.
SaaS Mode Billing
GoHighLevel's SaaS mode lets you resell the platform to clients under your own brand. Stripe handles all the billing:
- Connect Stripe at the agency level
- Enable SaaS mode in your agency settings
- Set your pricing tiers (monthly, annual, custom)
- When clients sign up, Stripe charges them automatically
- You keep the revenue; GoHighLevel charges you the wholesale rate
This is how agencies build recurring revenue on top of GoHighLevel. Your clients pay you $297 to $497 per month. You pay GoHighLevel $97 to $297 depending on your plan. The margin is yours.
White-Label Payment Pages
When clients complete purchases through your white-labeled GoHighLevel setup, the Stripe checkout uses your branding, not Stripe's default. This means:
- Your business name appears on the credit card statement
- Your custom domain handles the checkout
- The receipt emails come from your domain (if configured)
Multi-Location Stripe Setup
For agencies managing dozens or hundreds of client sub-accounts:
- Each sub-account connects its own Stripe account
- Revenue flows directly to the client's bank account
- You manage the GoHighLevel subscription separately
- No co-mingling of funds
This is the cleanest setup for compliance and client trust. Each client sees their own revenue in their own Stripe dashboard.
Optimizing Stripe for Maximum Conversions
Getting Stripe connected is step one. Optimizing it for conversions is where the real revenue gains happen.
Enable All Payment Methods
Stripe supports Apple Pay, Google Pay, and Link (Stripe's one-click checkout). Enable these in your Stripe dashboard under Settings > Payment Methods. These show up automatically on GoHighLevel checkout pages and can increase mobile conversion rates by 10 to 20 percent.
Use Stripe Radar for Fraud Protection
Stripe Radar is included with every Stripe account and uses machine learning to detect fraudulent transactions. It blocks suspicious payments automatically. For high-ticket offers, you can enable 3D Secure authentication which adds an extra verification step.
Optimize Your Statement Descriptor
The statement descriptor is what customers see on their bank or credit card statement. A clear descriptor reduces chargebacks and support tickets. Set this in Stripe under Settings > Public Details > Statement Descriptor.
Bad example: STRIPE* GOHIGH
Good example: HAVSTOCK COACHING
Set Up Automatic Retries
Stripe automatically retries failed subscription payments using its Smart Retries feature. This uses machine learning to pick the optimal retry time (when the card is most likely to succeed). Enable this in Stripe under Settings > Subscriptions and Emails > Manage Failed Payments.
Connecting Stripe to GoHighLevel Templates
If you're using pre-built GoHighLevel templates or snapshots, like the High Ticket OS, the payment setup is even faster. Templates come with order forms already designed and configured. You just need to:
- Import the template/snapshot into your sub-account
- Connect your Stripe account to the sub-account
- Open the funnel's order form
- Update the product details and pricing to match your offer
- Map any recurring products to your Stripe Price IDs
The template handles the layout, design, and conversion optimization. You just plug in your Stripe account and product details. It's the fastest way to go from zero to a working payment funnel.
For coaches and consultants selling discovery calls or high-ticket programs, the High Ticket OS template includes a complete funnel with integrated order forms designed for 4 and 5-figure offers.
FAQ
How long does it take to connect Stripe to GoHighLevel?
The actual connection takes about 2 minutes. It's a simple OAuth authorization flow. If you don't have a Stripe account yet, creating and verifying one takes 24 to 48 hours. Once verified, connecting to GoHighLevel is instant.
Can I use PayPal instead of Stripe with GoHighLevel?
You can use PayPal alongside Stripe, but PayPal has limited integration points in GoHighLevel. It works for one-time funnel payments but doesn't support all features like invoicing, proposals, or the full payments dashboard. Stripe is the recommended primary gateway.
Does GoHighLevel charge extra fees on top of Stripe's processing fees?
No. GoHighLevel does not add any markup on Stripe transactions. You pay Stripe's standard rate of 2.9% plus $0.30 per transaction. GoHighLevel's cost is covered by your monthly subscription.
Can I connect multiple Stripe accounts to one GoHighLevel sub-account?
No. Each sub-account supports one Stripe connection at a time. If you need to switch Stripe accounts, disconnect the current one first, then connect the new one. Any existing subscriptions will be disrupted, so plan the migration carefully.
What happens to existing subscriptions if I disconnect and reconnect Stripe?
Existing subscriptions in Stripe continue to charge the customer. However, GoHighLevel may lose the webhook connection, meaning payment events won't trigger automations or update the contact record. Always test after reconnecting.
Is the Stripe integration available in all countries?
Stripe is available in 47 countries. GoHighLevel's Stripe integration works in all of them. Check Stripe's country availability page to confirm your country is supported before setting up your account.
Can I process refunds through GoHighLevel?
Yes. You can process full and partial refunds directly from GoHighLevel's Payments section. The refund is processed through Stripe and reflected in both dashboards. You can also refund directly from Stripe's dashboard, though GoHighLevel won't automatically update the contact's payment status in that case.
How do I handle Stripe fees for high-ticket sales?
For high-ticket sales ($2,000+), Stripe's percentage fee becomes significant. Consider applying to Stripe's custom pricing for high-volume accounts. You can also pass the processing fee to the customer by adding it to the product price. Some businesses add a 3% "processing fee" line item.
Ready to start processing payments through your GoHighLevel funnels without building everything from scratch? The High Ticket OS gives you a complete funnel system with order forms, automations, and conversion-optimized checkout pages ready to connect to Stripe.